




Compare peel-and-stick arches to stencils for playrooms.
Compare peel-and-stick arches to stencils for playrooms. If you’re choosing between an instant wall update and a weekend of paint, the difference affects more than appearance. It affects your time, tools, wall finish and how easily the room can change as your child grows.
Key Takeaways
- Peel-and-stick arches deliver a finished look in minutes, while stencils demand painter's tape, steady hands and a full afternoon of careful work.
- Stencils win on custom color matching, so they suit parents who need an exact shade to coordinate with existing furniture.
- Paint bleeds and smudged edges are common stencil setbacks, and fixing them usually means repainting the entire wall.
- Removable arches peel away cleanly without damaging paint or drywall, which matters most in rented homes and nurseries that change often.
- For playrooms that evolve quickly as children grow, peel-and-stick arches offer the better mix of speed, flexibility and low commitment.
We’ve looked at the practical details parents need before reaching for a paintbrush: application time, clean edges, removal, everyday mess and rental-friendly decorating. Here’s how each option fits family life without turning your playroom into a building site. 💛
Playroom Arches vs. Stencils: Your Quick Decision Guide
The Big Question: Arches or Stencils for Your Playroom?
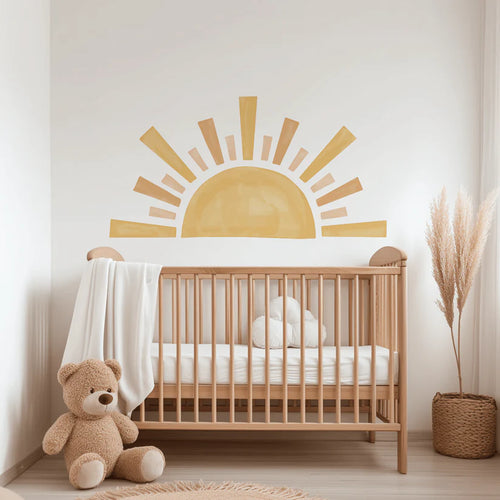
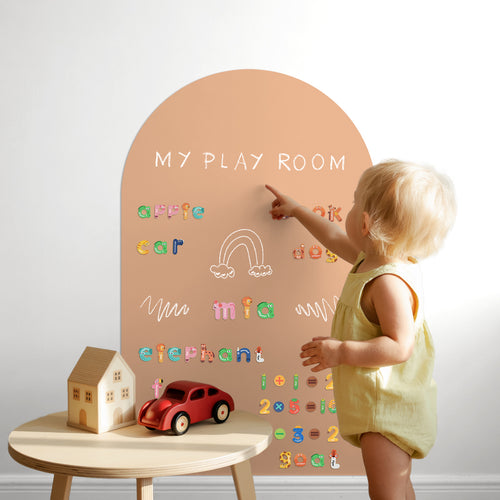
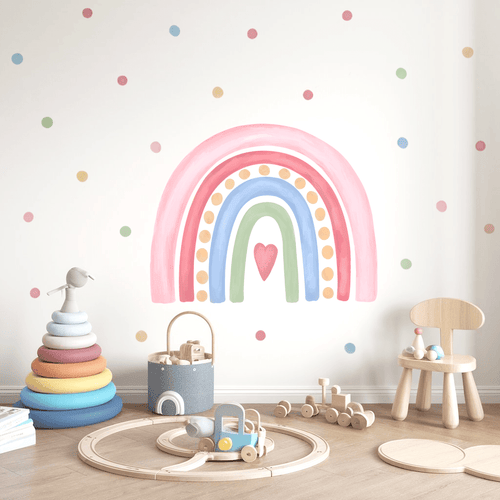
Peel-and-stick arches give you a ready-made shape to position, smooth and enjoy. They create a defined reading nook, pretend-play corner or backdrop for a toy shelf without mixing paint or waiting for coats to dry. Painted stencils offer a traditional DIY route, with masking, rolling and touch-ups needed to build the finished arch.
You can create a clean arch without paint bleeding beneath the edges, but stencil success depends on careful preparation, the right paint amount and a steady hand. A quality removable arch arrives with its outline already formed, helping you achieve a tidy finish with less guesswork.
Why This Comparison Matters for Busy Parents
Playrooms are full of movement. Furniture shifts, storage changes and small people develop new favourite colours quickly. A painted design may look lovely, yet feel permanent once it is on the wall. Removing it usually means sanding, repainting or living with a patch until the next decorating day.
Compare peel-and-stick arches to stencils for playrooms and the parenting reality becomes clear: flexibility has real value. You can create a special feature without committing the whole room to one theme, making it easier to match the rest of your home and adjust the space later.
What We'll Cover: Your Checklist for Choosing
Use four questions to guide your decision. How quickly must the room be ready? Do you need crisp edges without paint bleed? Could the design need to come down when you move home or change the layout? How much preparation, cleaning and storage do you want after the project?
The Reality of Playroom Decor: Time, Mess, and Magic

Peel-and-Stick Arches: The Instant Playroom Transformation ✨
With Nursery Stickers, the process is straightforward: prepare a clean, dry wall, position the arch and smooth it down with a squeegee or soft cloth. Custom Vinyl Decor reports an average application time of 10 to 15 minutes for peel-and-stick arches, compared with 4 to 8 hours for stencil preparation, multiple paint coats and clean-up. That difference matters when nap time is short or the playroom must be ready before the next round of toy chaos.
The finish also arrives without paint tins, rollers, trays or drying fumes. A soft matte surface can frame a book corner, dress up a plain wall or give a craft table its own zone. You can peel, stick and update the room while your child is nearby, rather than protecting skirting boards and wet paint.
Painted Stencils: The Classic, But Complicated, Approach 🎨
Stencilling can produce a lovely painted shape, but the preparation list grows quickly. Custom Vinyl Decor identifies at least six typical tools: a stencil sheet, painter’s tape, repositionable spray adhesive, foam roller, paint tray and touch-up brush. You may also need a drop cloth, measuring tape, level and spare wall paint for corrections.
Paint can creep beneath a low-tack edge, particularly if the roller is overloaded or the wall has a lightly textured surface. Multiple coats add drying time, while removing tape too early can pull at the finish. The result may suit a committed DIY enthusiast, but it is less forgiving when a toddler needs attention or the project must pause.
Pros of painted stencils
- Paint becomes part of the wall finish once dry.
- You can mix your own colour and adjust the painted shape.
- The method suits parents who enjoy hands-on decorating.
Cons of painted stencils
- Preparation, drying and clean-up can take most of a day.
- Bleed-through may spoil otherwise tidy edges.
- Changing the design usually means repainting the wall.
The 'Zero-Mess' Parenting Promise: What We Mean
Zero mess does not mean your playroom will remain perfectly tidy for a full afternoon. It means the decorating job does not need paint splashes, open tins, strong fumes or equipment waiting beside the wall. Peel-and-stick arches keep the work contained to positioning and smoothing, with no wet surface for little hands to discover.
Before applying any removable design, check that the paint is fully cured and test a small hidden area, especially on delicate plaster or a recently painted wall. Remove it slowly from a corner rather than tugging sharply. This cleaner process is often the happier choice for renters, busy families and anyone who wants a little room magic without a clean-up marathon.
Head-to-Head: Arches vs. Stencils in the Playroom Trenches
Installation Speed: Minutes vs. Hours (and Days!)
Compare peel-and-stick arches to stencils for playrooms and the time difference is hard to miss. Custom Vinyl Decor reports an average application time of 10 to 15 minutes for a peel-and-stick arch, using just a squeegee or soft cloth. You position the design, smooth away bubbles and get back to playtime.
Stencilling needs a stencil sheet, painter’s tape, repositionable spray adhesive, foam roller, paint tray and touch-up brush, according to Custom Vinyl Decor. Measuring, masking, painting, drying, recoating and cleaning can take 4 to 8 hours. That is a sizeable project when the playroom also needs furniture moving, toy supervision and bedtime.
Crisp Lines & Zero Bleed: Achieving Perfection
A peel-and-stick arch arrives with its shape already printed and cut, so the outline does not depend on paint control. Once the wall is clean, dry and suitable for removable vinyl, gentle smoothing helps the design sit neatly against the surface. A soft matte finish can look considered beside shelves, bookcases and craft tables without the hard shine of some wet-look paints.
Painted stencils can also create a smart arch, yet the edge needs careful handling. Too much paint on a foam roller, uneven pressure or a lightly textured wall may allow colour to creep beneath the stencil. Low-tack adhesive helps with positioning, but cannot remove every risk of bleed-through. Touch-up paint and a fine brush may be needed before the shape looks finished.
Clean Removal & Renter-Friendliness: Protecting Your Walls (and Deposits!)
Removable wall stickers suit families who want a feature without a permanent painted mark. With Nursery Stickers, lift the arch slowly from a corner rather than pulling sharply. Testing a small hidden area first is sensible, particularly on delicate plaster, older paint or a recently decorated wall. This gives renters more control when a tenancy inspection or house move is ahead.
A painted stencil becomes part of the wall once the emulsion dries. Changing the colour or removing the shape can involve sanding, priming and repainting, with matching the surrounding shade as an extra challenge. For a family worried about a deposit, resale appeal or a future room refresh, a removable design keeps the decision reversible.
Durability & Playroom Proofing: Sticky Fingers & Scuffs
Playrooms ask a lot of their walls. Toys bump skirting boards, little hands touch everything and craft sessions can leave fingerprints. A quality removable arch can handle ordinary contact when applied to a smooth, prepared wall. For cleaning, use a soft, slightly damp cloth and avoid abrasive sprays, scrubbing pads or soaking the surface.
Painted shapes have no sticker edge to lift, which may appeal to families wanting a fixed finish. Yet scuffs can still mark acrylic emulsion paint, and cleaning may leave a patch that looks different from the surrounding wall. Either option benefits from sensible furniture placement, but stickers make a later refresh less disruptive if the playroom takes a few knocks.
Adaptability: Decor That Grows With Them 🚀
Children’s interests can change from rainbows to rockets before you have finished organising the toy storage. A removable arch can define a quiet reading corner today, then move with the layout when a desk, den or dressing-up station takes its place. You can choose a new colour or shape without repainting the entire wall.
A stencil offers a lasting painted backdrop, which works well if you know the room’s colour scheme and layout will stay in place. For families who value quick changes, rental-safe decorating and a playroom that follows each new phase, peel-and-stick arches offer the more forgiving choice.
| Feature | Peel-and-stick arch | Painted stencil |
|---|---|---|
| Typical project time | About 10 to 15 minutes | About 4 to 8 hours, including preparation and clean-up |
| Equipment | Squeegee or soft cloth | Stencil, tape, adhesive, roller, tray and touch-up brush |
| Edge control | Pre-cut shape with no wet paint | Needs careful paint loading to reduce bleed |
| Removal | Lift slowly when a change is needed | Usually requires repainting or wall repair |
| Best match | Busy families, renters and changing themes | Committed DIY projects with a fixed design |
Beyond the Basics: Why Peel-and-Stick Arches Win for Playrooms
The 15-Minute Playroom Reset: Instant Zones, Zero Fuss
A playroom does not need a full makeover to feel fresh. A peel-and-stick arch can give a reading nook, craft table or dressing-up corner its own visual boundary, helping the room feel more organised without moving every toy into storage. When the layout changes, the arch can move with it.
That quick reset is useful before a birthday tea, after a furniture shuffle or when a once-loved play area needs a lift. There is no paint tray to wash, drying period to protect or half-finished project beside the wall. Position the design carefully, smooth it with a soft cloth or squeegee, and enjoy the little moment of magic. ✨
The Anti-Commitment Approach: Flexible Style for Changing Tastes
Children’s preferences rarely stay still. A soft rainbow may suit the room this year, while a space-inspired scheme becomes the only acceptable choice next year. Removable arches let you follow those changes without repainting a whole wall or worrying that a bold shape will clash with the rest of your home.
This flexibility also helps if you are decorating a rented flat, preparing a room for resale or still working out your child’s personal style. You can test a colour, define a feature area and change your mind without turning one decorating decision into a long-term commitment.
Cost Breakdown: Beyond the Initial Purchase Price
The price of decorating is not only the amount paid at checkout. A painted stencil may also involve paint, tape, adhesive spray, rollers, trays, brushes and protective coverings. Add cleaning time, possible touch-ups and repainting when the design no longer suits the room, and the original budget tells only part of the story.
A removable arch needs little equipment and can be refreshed without buying a new wall finish. Its value comes from time saved, reduced preparation and the ability to reuse the room for a new stage of childhood. For busy families, that freedom can matter as much as the initial purchase price.
Your Playroom Decor Decision: Which is Right for You?

Choose Peel-and-Stick Arches If.
Choose a removable arch if your priority is a quick room update, clean application and easy changeovers. It suits renters, busy parents, families with changing layouts and anyone who wants a playful feature without committing to one colour or theme. It is also a good choice if paint fumes, drying time and clean-up do not fit comfortably into your week.
Consider Painted Stencils If.
A painted stencil may suit you if you enjoy hands-on decorating, have the exact wall colour planned and want the shape to remain part of the room for years. It gives you freedom to mix paint shades, yet you should be ready for careful masking, drying periods, paint bleed checks and future repainting if your plans change.
Nursery Stickers: Your Go-To for Playroom Magic 💖
Compare peel-and-stick arches to stencils for playrooms, and the best choice depends on how much flexibility you want after decorating day. At Nursery Stickers, we make removable designs for real family spaces: simple to apply, easy to update and ready to bring personality to a plain wall.
Choose the arch for speed, tidy installation and a room that can change with your child.
Choose the stencil if you genuinely enjoy a longer paint project and want a fixed finish.
Choose Nursery Stickers when you want to peel, stick and create a playroom that feels wonderfully yours, without the decorating drama. 💛
Frequently Asked Questions
Which option is better for a playroom that needs decorating quickly?
Peel-and-stick arches are better for a playroom that needs a quick update. Application can take around 10 to 15 minutes, with positioning and smoothing replacing measuring, masking, painting and drying. Painted stencils may take four to eight hours, so a removable arch can suit busy family routines more comfortably.
Do peel-and-stick arches give cleaner edges than painted stencils?
Peel-and-stick arches usually give cleaner edges than painted stencils because the shape is already formed. Painted stencils can develop paint bleed if the roller is overloaded, the stencil shifts or the wall has light texture. Careful preparation and touch-ups can still produce a smart painted finish.
Which playroom decorating method creates less mess?
Peel-and-stick arches create less decorating mess than stencils because they do not require paint tins, rollers, trays or drying coats. The work mainly involves preparing the wall, positioning the arch and smoothing it with a soft cloth or squeegee. That keeps wet paint and decorating equipment away from everyday play.
Are peel-and-stick arches a good choice for renters?
Peel-and-stick arches can be a good choice for renters because they offer a temporary-looking design update without painting directly onto the wall. Check the wall condition and test a small hidden area before application, then remove the arch slowly from a corner. Always follow the product guidance for the surface.
Which option is easier to change as a child grows?
Peel-and-stick arches are easier to change as a child grows because the design can be taken down without repainting the whole wall. A painted stencil becomes part of the wall finish, so changing its colour or shape usually means repainting. This flexibility can help a reading nook or play corner evolve over time.
What should parents check before applying a peel-and-stick arch?
Parents should check that the wall is clean, dry and fully cured before applying a peel-and-stick arch. A small hidden-area test is sensible, particularly on delicate plaster or a recently painted surface. Smooth the design down carefully, and remove it slowly from a corner rather than pulling sharply.