


Key Takeaways
- Name designs provide a mess-free and cost-effective way to personalise your child's room.
- These designs include options like removable wall stickers and soft furnishings.
- Personalised name designs help children feel a sense of ownership over their space.
- Name designs offer flexibility to adapt to your child's changing tastes.
- Transforming a room with name designs requires no painting or professional decorating.
Table of Contents
- What Are "Name Designs" – And Why Do They Work So Well in Children's Rooms?
- Types of Name Designs for Kids' Rooms (From Simple to Statement)
- Design Basics: How to Make a Child's Name Look Beautiful and Readable
- Choosing a Style: From Minimalist to Playful for Your Child's Name
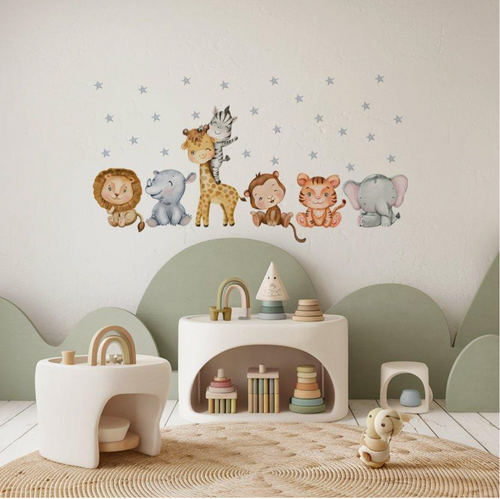
- Playful and Themed Name Designs
- Name Designs That Adapt From Nursery to School Age
- Step-by-Step: Designing Your Child's Name (No Experience Needed)
- Applying Removable Name Stickers Like a Pro
- Quick Fixes for Common Name Design Problems
- Name Design Ideas for Different Family Situations
Name Designs: Creative Ways to Personalise Your Child's Space (Without Paint or Wallpaper)
Transforming your child's room doesn't require a paintbrush or a decorator. Name designs offer the perfect solution for busy parents who want to create something special without the mess, cost, or commitment of traditional decorating. Removable wall stickers to soft furnishings, these personalised touches help children feel ownership over their space whilst giving you the flexibility to adapt as their tastes evolve.
For parents seeking a premium finish, premium stickers (woven fabric) are an excellent choice for achieving a high-quality, mess-free look that can be updated as your child grows.
What Are "Name Designs" – And Why Do They Work So Well in Children's Rooms?
Simple definition for busy parents
Name designs are any creative way of styling your child's name or initials as room decor. This includes removable wall stickers, framed prints, cushions with letters, door signs, and storage labels. Whether you're designing a layout digitally or choosing physical decor pieces, the goal is the same: making their name a beautiful focal point that reflects their personality.
Why children love seeing their name
Children develop letter recognition around age 2-3, and seeing their name displayed helps reinforce this learning naturally. More importantly, it gives them a sense of ownership and pride – this is my room, with my name on the wall. When it's time for room transitions, from nursery to toddler bed to big-kid space, having their name as a constant element makes changes feel exciting rather than unsettling.
A name design is any decorative way of displaying your child's name or initials in their room – from wall stickers to prints and soft furnishings that make the space uniquely theirs.
Types of Name Designs for Kids' Rooms (From Simple to Statement)

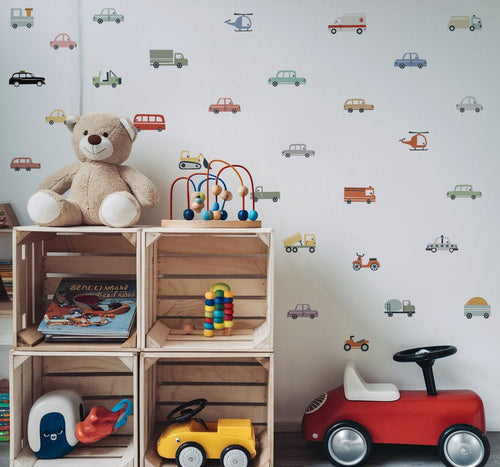
Wall-based name designs
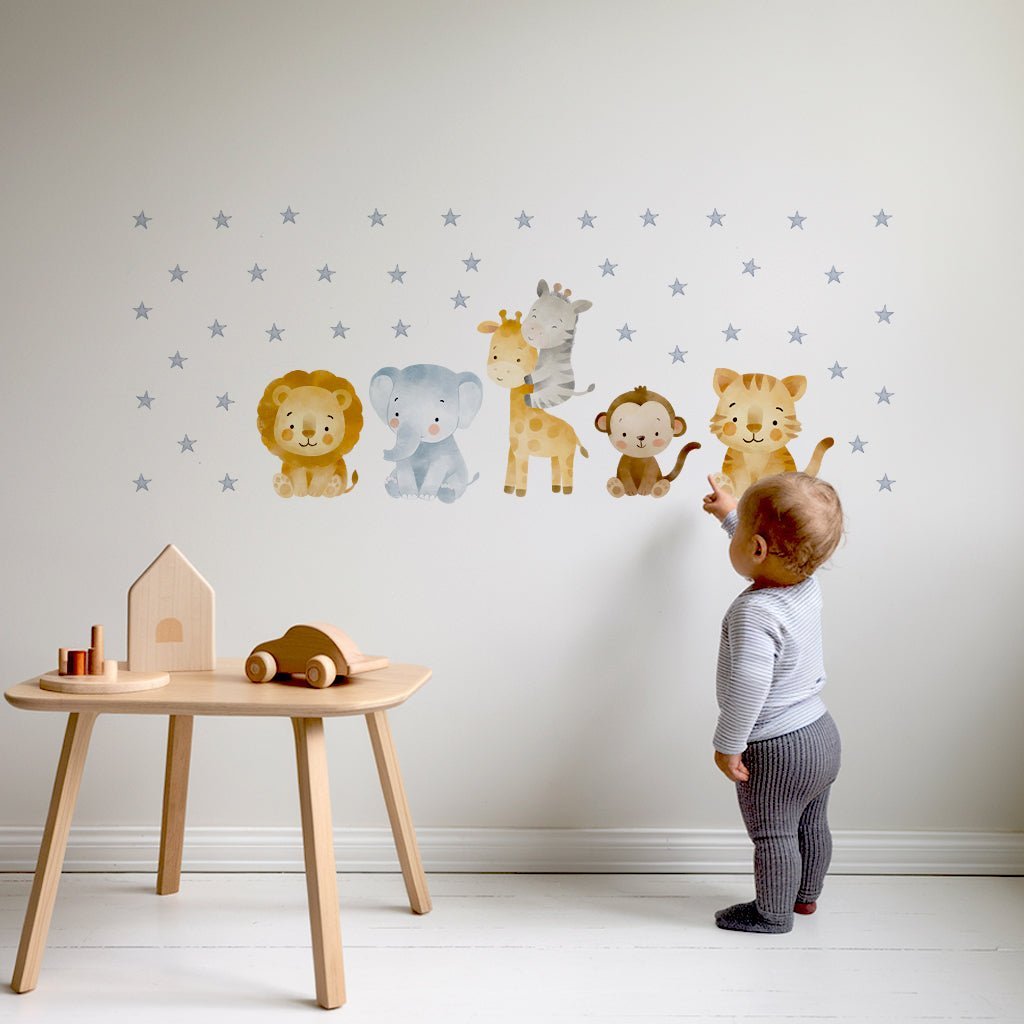
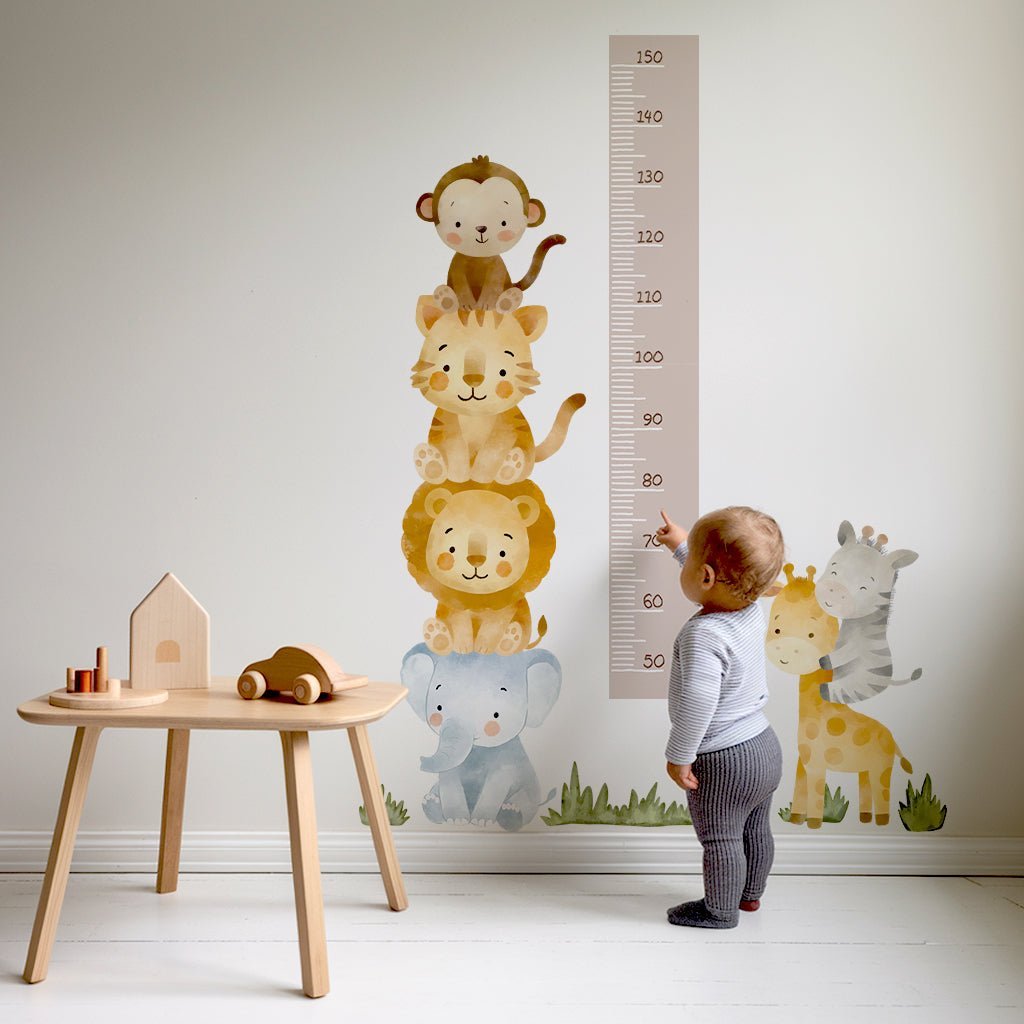
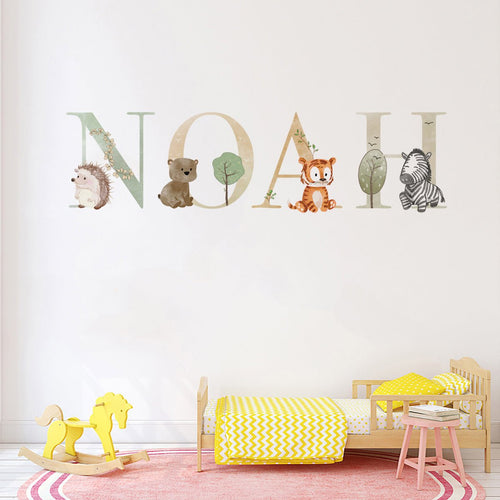
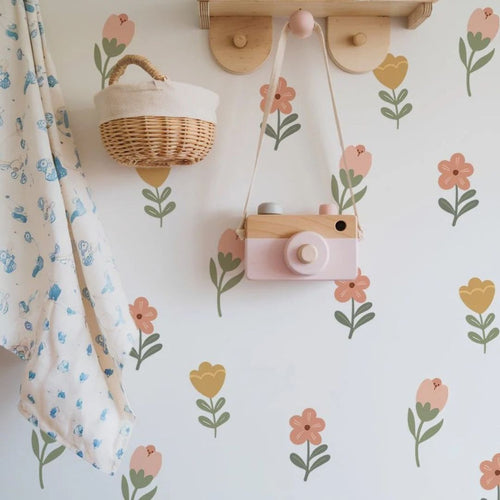
Wall stickers offer the look of painted lettering without the permanence. A single oversized initial (40-60cm tall) above the cot creates instant impact, whilst a curved name spanning 120-150cm over a bed becomes a beautiful headboard alternative. Add small coordinating icons like stars, rainbows, or animals to complete the look without overwhelming the space.
Soft furnishings and accessories
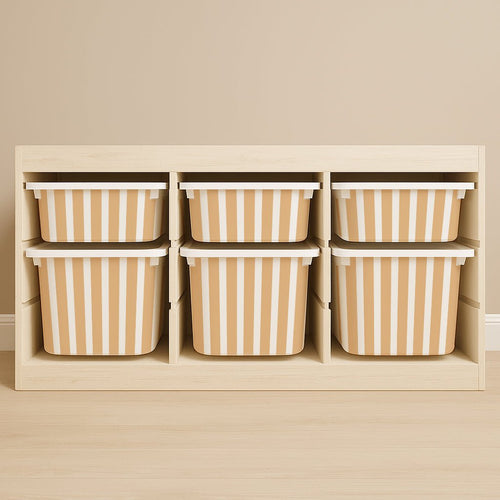
Letter cushions (20-40cm tall) transform a reading chair into a personalised nook, whilst name bunting adds charm above windows or shelves. Personalised storage labels help toddlers learn organisation skills whilst keeping the room tidy and themed. For more ideas on practical labelling, see this guide to name labeller solutions for kids' rooms.
At-a-glance ideas list
- Vertical name down the side of a wardrobe
- Name arc over a gallery wall of family photos
- Mini name decal on bedside table drawer
- Initial inside a rainbow or cloud shape
- Name with birth date underneath in smaller text
- Scattered letters across a play corner wall
- Name on removable panel behind the bed
- Initials on storage basket labels
Design Basics: How to Make a Child's Name Look Beautiful and Readable
Legibility first (especially from 1–3 metres away)
For wall displays, aim for minimum letter heights of 8-10cm for close viewing, or 15-20cm to read clearly across the room. Test readability by viewing your chosen font on your phone at 25-30% zoom – if it's hard to read on screen, it'll be unclear on the wall.
Balance, spacing, and hierarchy
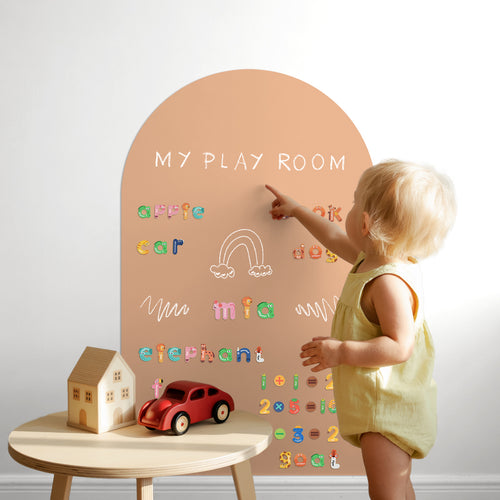
Leave at least a hand's width margin around the name on all sides. Shorter names need extra spacing to avoid looking cramped, whilst longer names benefit from slightly tighter letter spacing. Add visual interest with a smaller subtitle like "adventure club" or their birth year underneath the main name.
| Style | Vibe | Best for | Things to watch |
|---|---|---|---|
| Sans serif | Clean, modern | Minimalist rooms, long names | Can feel cold if too thin |
| Script | Elegant, flowing | Shorter names, traditional decor | Harder to read from distance |
| Display | Playful, bold | Feature walls, confident statements | Use sparingly, avoid mixing two display fonts |
Choosing a Style: From Minimalist to Playful for Your Child's Name
Minimalist name designs
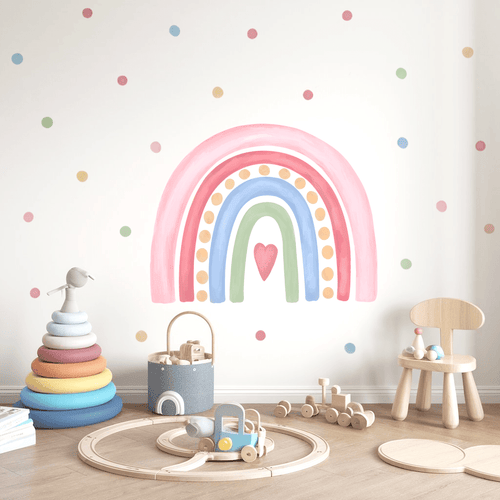
Clean lines, 1-2 colours, and plenty of breathing space work beautifully in neutral nurseries and rental properties. Choose a single-colour name in soft charcoal, clay, or deep navy, keeping decorative elements to one type – just stars, not rainbows plus animals. A single decorative element creates visual calm whilst still feeling personal and special.
Playful and Themed Name Designs

Themed name designs that capture their current obsession
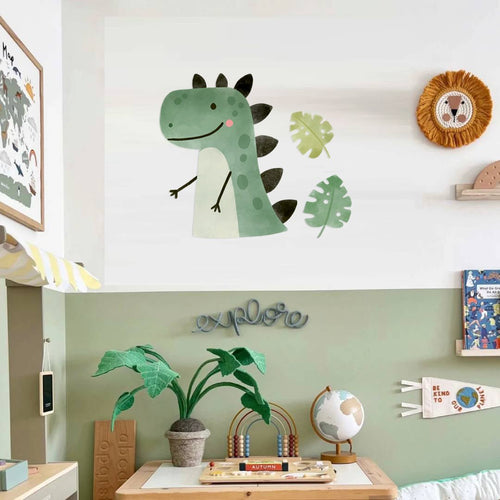
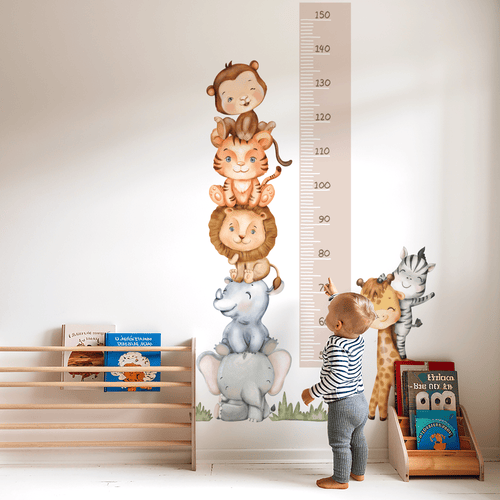
Playful name designs work brilliantly when they reflect your child's current interests. Link the name to popular themes like safari animals, woodland creatures, space exploration, rainbows, transport, or sea life. For example, "LOTTIE" in soft script with scattered pastel rainbows creates a dreamy feel, whilst "ARLO" in chunky sans serif with tiny safari animals marching underneath brings adventure to the wall. For more inspiration, check out these woodland creatures ideas for themed rooms.
Keep decorative motifs to 2-3 types maximum per wall to avoid visual overwhelm. Repeat colours from existing bedding or rugs to pull the room together naturally. The beauty of removable name designs lies in their flexibility – when your little one moves from dinosaurs to rockets, you can swap the supporting elements in minutes whilst keeping the name itself.
Balancing trendy touches with timeless appeal
The smartest approach uses a "60/40" rule that parents love. Keep 60% timeless – classic fonts, soft muted palettes, simple stars or geometric shapes. Add 40% trend-led elements through easily swappable extras like themed decals or coloured cushions. This means the core name design stays beautiful for years, whilst the fun, trendy bits can be refreshed in 5-10 minutes as styles change.
Trend-led looks might include neon colours, graffiti effects, or ultra-bold gradients. Timeless elements include classic serif fonts, gentle curves, and nature-inspired palettes. Choose your base wisely, then have fun with the accessories.
Name Designs That Adapt From Nursery to School Age
Planning for the next 3-5 years of room evolution
Smart name designs anticipate how your child's tastes will evolve. Choose the name style and core colours to work from baby through to school age, then swap out the surrounding theme elements. A well-chosen name in navy or charcoal will look just as good with teddy bears at age 2 as it does with football stickers at age 7.
The key is keeping the name or initial consistent whilst refreshing everything around it. This approach saves money and reduces waste, whilst giving your child the excitement of a "new" room that still feels familiar and secure.
Real-life room refresh scenarios
Scenario 1: Emily's room started with her name in blush script surrounded by soft rainbows for the nursery. At age 4, her parents kept the "EMILY" exactly where it was and swapped the rainbows for planets and stars in 15 minutes. The name provided continuity whilst the new theme reflected her growing love of space.
Scenario 2: Baby Jax had his name above the cot with an animal parade underneath. When he turned 6 and wanted a "big boy" room, his parents moved the name above his new desk and added sport icons instead of animals. The removable stickers meant no repainting and zero residue left behind. For more on transitioning name signs as your child grows, see these name signs nursery tips.
Flexible Layout Tip: Use smaller name segments or stack first and middle names. This creates more layout options as the room evolves and makes it easier to incorporate new themes around the existing name design.
Step-by-Step: Designing Your Child's Name (No Experience Needed)
Step 1: Choose the wording and double-check spelling
Decide whether you want the full name, first name only, a nickname, or just initials. Consider how the name will look in 3-4 years – will "Little Bear" still feel right when they're at school? Check spelling carefully, including any accents or double-barrel surnames. This 3-5 minute step prevents costly mistakes later.
Step 2: Sketch three simple layout ideas
- Draw the name in a straight horizontal line
- Sketch it in a gentle curve or arc shape
- Try a stacked version with first name on top, middle name underneath
Spend roughly 2 minutes per sketch using just pencil and paper. Circle your favourite – this becomes your blueprint. Don't worry about artistic skill; these are planning tools, not masterpieces.
Step 3: Test fonts and colours using free digital tools
Use simple online editors to try your chosen name in three different styles: one bold sans serif, one softer script, and one all-caps option. Time-box this to 10-15 minutes maximum to avoid overwhelm. Screenshot your top 2 choices and view them on your phone from arm's length – this simulates how they'll look on the wall.
Step 4: Measure your wall space accurately
Measure the available wall width in centimetres, leaving at least 15-20cm gap from edges and ceiling. For a 200cm wall, aim for a name width of 80-120cm. On cot walls, keep the bottom of the name at least 20-30cm above the cot top for safety and visual balance. For more on safe nursery environments, see this crib safety resource.
Applying Removable Name Stickers Like a Pro
Step 5: Turn your design into wall art
You have three main options: printable artwork in A4 or A3 frames for a budget-friendly start, custom cut name decals that apply directly to the wall, or multiple smaller stickers you can arrange yourself for maximum flexibility. Each approach works beautifully – choose based on your confidence level and whether you're renting or own your home. For a unique look, consider wood sign names as an alternative to decals or prints.
Step 6: Test the layout before committing
Cut paper templates to full size and blu-tack them to the wall for 5-10 minutes. Check how the height feels when you're standing and when sitting on the floor for story time. Take a quick photo to see if the positioning feels centred and balanced. This simple test prevents the disappointment of a name that looked perfect in your head but feels wrong on the wall.
Time Investment: Planning name designs takes roughly 30-40 minutes from initial idea to placing your order – less time than choosing a paint colour, with much more flexibility for future changes.
Applying Removable Name Stickers Like a Pro

Prep your wall in 2-3 minutes
Wipe the area with a dry, lint-free cloth to remove dust and fingerprints. Ensure paint is fully cured – typically at least 2 weeks after painting – as fresh paint can lift with the sticker. Avoid heavily textured or flaky walls for small, detailed fonts, as they won't adhere properly and may look uneven.
Professional positioning and alignment techniques
- Use a strip of low-tack masking tape to mark your baseline
- Mark the wall's centre point with a light pencil dot
- Start with the centre letter and work outwards for separate letter stickers
- For single-piece names, align the centre of the word with your centre mark
- Step back every 2-3 letters to check the overall balance
Allow 5-7 minutes for positioning a standard 6-letter name. Rushing this stage shows in the final result, whilst careful placement looks professionally installed.
Achieving smooth, bubble-free finishes
Use a clean, dry cloth or plastic card wrapped in soft fabric to smooth from the centre outwards. Apply firm, even pressure but avoid stretching the material. For fabric-style name designs, tiny micro-bubbles usually disappear within 24 hours as the material settles. Work in good lighting so you can spot any air pockets immediately.
Removing or repositioning without wall damage
Lift one corner slowly at a 45-degree angle, supporting the rest of the sticker as you peel. If the room is very cool, warm the sticker gently with your hands for 30 seconds to make removal easier. Quality removable stickers leave zero residue on properly prepared, smooth walls – one of the key advantages over painted lettering. For more on healthy home environments for children, see this children's environment guide.
Quick Fixes for Common Name Design Problems
When the name looks "off" on the wall
If your name appears too small, add supporting elements like scattered stars, dots, or mini icons in a loose halo around it rather than starting over. For names positioned too low, add a complementary second line underneath – "PLAYROOM", "DREAM BIG", or their birth year – to balance the composition. When the name sits off-centre, create visual balance with artwork or floating shelves on the lighter side.
Quick Problem Fixes:
- Script font unreadable: Increase letter spacing by 2-3mm and go up one size
- Colours disappearing into wall: Add a thin white or charcoal outline, or place name on a simple backdrop shape
- Busy wallpaper behind name: Use a solid colour cloud or arch shape behind the lettering to calm the pattern
Updating styles your child has outgrown
For fast refreshes taking 10-20 minutes, keep the name sticker exactly where it is and swap out the themed elements around it. Remove babyish icons like rattles or bottles and replace with age-appropriate decals – sports equipment, musical notes, or geometric patterns. Alternatively, move the original name from the cot wall to a reading nook and create a fresh, bigger design over their new bed.
Long Name Solution: Names with 8+ letters work beautifully when stacked (first name above, middle name below) or arranged in a gentle curve. Consider using their nickname for wall art whilst keeping the full name for door signs or storage labels.
Name Design Ideas for Different Family Situations
For first-time parents creating a nursery from scratch
Start with a soft arch-shaped backdrop behind the cot with baby's name centred inside – this creates an instant focal point that photographs beautifully. Add a meaningful second line like "since 2025" or their birth month underneath for a personal touch that grandparents will love. This approach gives you one stunning feature that makes the whole room feel complete, even if you keep the rest simple and neutral. As your baby grows, you can easily swap the arch colour or add themed icons around the name without needing to repaint or redecorate the entire space.
Frequently Asked Questions
What are the different types of name designs suitable for children's rooms?
Name designs come in many forms, including removable wall stickers, framed prints, personalised cushions, door signs, and storage labels. These options range from simple lettering to bold, themed designs, allowing you to choose something that fits your child's personality and the room's style.
How do name designs help children feel a sense of ownership and support their learning?
Seeing their name displayed in their room helps children recognise letters and builds early literacy skills naturally. It also gives them a sense of pride and ownership over their space, making the room feel truly theirs and supporting confidence as they grow.
What are the benefits of using removable name stickers compared to traditional decorating methods?
Removable name stickers offer a mess-free, affordable way to personalise a room without painting or hiring professionals. They apply in minutes, leave no residue when removed, and can be swapped out easily as your child's tastes change, making decorating flexible and stress-free.
How can name designs be adapted as a child grows from nursery age to school age?
Name designs can evolve by choosing styles that suit different ages, such as soft pastels for nurseries and bolder colours or themes for school-age children. Because removable stickers and decor can be updated quickly, you can refresh the look to match your child's changing interests without starting from scratch.