


Key Takeaways
- You can quickly transform a child's room into a magical fairies village using removable wall stickers.
- The process takes less than 20 minutes and requires no painting or mess.
- These stickers feature tiny houses, winding paths, and friendly fairies to create an enchanting scene.
- The decoration is easy to apply with a simple peel and stick method.
- This method allows for a fun and commitment-free room makeover.
Table of Contents
- What Is a Fairies Village? Turning Folklore into a Child's Bedroom Theme
- Planning Your Fairies Village Space: Where, How Big, and How It Grows
- Creating a Fairies Village with Wall Stickers: Step‑by‑Step Layout Ideas
- Bringing Your Fairies Village to Life: Colour, Light, and Texture
- Involving Your Child: Storytelling, Play, and Seasonal Fairy Village Updates
- Seasonal Fairy Village Swaps (5–10 Minutes Each)
- Practical Tips: Applying, Moving, and Caring for a Fairy Village Made with Stickers
- Fairy Village Ideas for Different Homes and Budgets
Fairies Village: How to Create a Magical Fairy Village Bedroom or Play Corner for Your Child (Without Paint or Wallpaper)
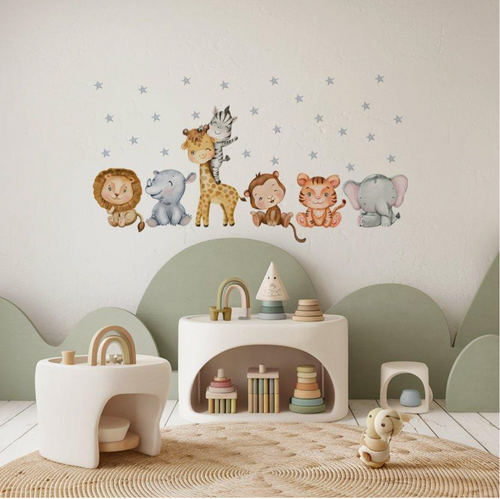
Transform your child's room into an enchanting fairies village in under 20 minutes using removable wall stickers. No brushes, no mess, no commitment, just peel, stick, and watch their eyes light up as tiny houses, winding paths, and friendly fairies appear on the wall.
Whether you're decorating a first nursery or refreshing a toddler's space, a fairy village theme offers endless storytelling possibilities whilst being completely flexible as your little one grows. Best of all, when they inevitably discover dinosaurs or space rockets, you can remove every sticker without a trace and start fresh. Arch wall stickers make a perfect focal point for your fairies village, adding depth and whimsy to any layout.
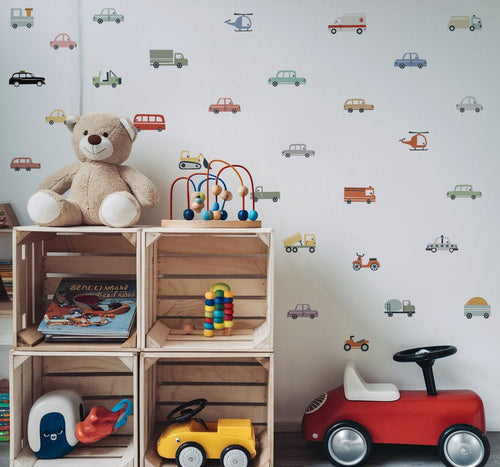
For more inspiration on creating a magical space, you might enjoy these ideas for 10 creative ways to use nursery stickers for a magical room makeover.
What Is a Fairies Village? Turning Folklore into a Child's Bedroom Theme
Fairy Villages in Stories and Children's Imagination
A fairies village brings the magical world of tiny woodland dwellers into your child's everyday space. Picture clusters of mushroom houses no bigger than your palm, cobblestone paths that wind between flower gardens, and miniature doors tucked into tree roots, all scaled perfectly for fairy-sized residents.
Rooted in European folklore, these hidden communities traditionally lived in mossy glades and hollow tree trunks, invisible to human eyes except for the occasional twinkle of fairy lights at dusk. This gentle magic translates beautifully into nursery décor because it's cosy rather than overwhelming, encouraging quiet play and bedtime stories rather than high-energy adventures.
Quick Answer: What do I need to start a fairies village wall?
- Fairy house wall stickers (3-5 different designs)
- Path-making elements (flowers, pebbles, leaves)
- One larger focal point (tree, toadstool cluster, or archway)
- Character stickers (2-3 fairies to bring it to life)
- Battery-powered fairy lights (optional but magical)
Key Elements of a Fairy Village Look
Every enchanting fairy village shares four core visual ingredients that work together to create that "stepped into a storybook" feeling. Clustered little houses with round doors and tiny windows form the heart of your village, whilst forest details like mushrooms, wildflowers, and trailing ivy connect everything naturally.
Winding paths made from small stepping stones or flower petals guide the eye between houses and create movement, even on a flat wall. Finally, soft lighting elements, whether sticker lanterns, glowing windows, or real fairy lights, add that essential sparkle that makes children believe in magic.
Why Fairy Villages Are Ideal for Flexible Kids' Rooms
Unlike painted murals that commit you for years, a fairies village created with removable wall stickers grows and changes alongside your child. Start with simple houses and friendly fairies for a baby, add adventure elements like bridges and treasure chests for toddlers, then introduce seasonal visitors or themed characters as they develop new interests.
When furniture moves or tastes change completely, every element lifts off cleanly in minutes. This flexibility makes fairy villages perfect for rental properties, shared bedrooms, or simply parents who love refreshing their child's space without the stress and expense of redecorating from scratch.
Planning Your Fairies Village Space: Where, How Big, and How It Grows

Choosing the Perfect Spot (Nursery, Playroom, or Reading Nook)
The magic happens at your child's eye level, making placement crucial for maximum enchantment. In nurseries, position your fairy village above the cot but keep stickers at least 30-40 cm clear of the mattress for safety. This creates a dreamy focal point for feeding times without any risk of little hands pulling at decorations.
For playrooms, try running the village along a low wall behind a toy kitchen or dollhouse, the themes complement each other beautifully, and the lower placement lets toddlers point out details during play. Reading corners work wonderfully too, with the village wrapping around a comfy floor cushion or mini armchair to create a dedicated story nook. For more decorating inspiration, see these fairies bedroom decor ideas.
Sizing Your Fairy Village (From 60 cm to a Full 3 m Wall)
Start with your available wall space and work backwards. A mini village strip measuring 60-90 cm wide fits perfectly above changing tables or narrow spaces between furniture. For medium scenes behind beds or cots, plan for 1.5-2 m across, enough room for 4-5 houses with connecting paths.
Full wall villages spanning up to 3 m can include multiple fairy neighbourhoods, winding trails, and seasonal areas that change throughout the year. Before applying anything permanently, use painter's tape to outline your planned area and live with it for 24 hours, this simple trick prevents that "it looked bigger in my head" disappointment.
Designing for Room to Grow
Smart fairy village planning leaves breathing room for future additions rather than filling every centimetre immediately. Build your core village first, main houses, primary paths, and one large tree or focal point, then add visiting fairies, seasonal animals, or themed elements as your child's interests develop.
This approach lets you start with a manageable fairy village that won't overwhelm the space or your budget, then expand the magic as your child grows and their imagination develops.
Creating a Fairies Village with Wall Stickers: Step‑by‑Step Layout Ideas
Classic Woodland Fairy Village Layout
Start your fairies village with this tried-and-tested approach that works beautifully in any nursery or playroom. Position a large tree or toadstool cluster slightly off-centre, about 80–100 cm above the floor, this creates visual interest whilst leaving space for your child to see the details. Add 3–5 fairy houses in a gentle curve beneath, spacing each 10–15 cm apart to avoid a cramped look.
Use small flower, pebble, and leaf stickers to form winding paths between houses, then add fairy characters near doors and windows at your child's eye level (approximately 90–110 cm from the floor). This height ensures toddlers can point to their favourite fairies whilst keeping the village safely away from curious hands during sleep time.
Fairy Village Around Furniture (Cots, Beds, and Shelves)
Frame a cot with delicate branches and hanging lantern stickers, keeping all elements 5–10 cm away from cot edges for safety. For low bookcases, create fairy doors at the base with matching windows on the wall above each shelf, this makes it look like the fairies live both behind and above the books. Use a daybed as your "village hill" with houses positioned above and a sticker path leading down towards the floor rug.
Always test sticker positions with low-tack painter's tape for 24 hours before final placement. This prevents any regrets and ensures your fairy village decorations complement rather than compete with existing furniture. For a whimsical touch, explore more about flower and fairies combinations for your wall stickers.
Vertical Fairy Village for Small Rooms and Rentals
When wall width is limited, build upwards with a floor-to-ceiling fairy tree trunk featuring tiny ladders, balconies, and doors stacked every 25–30 cm. Add fairy lifts made from vine stickers or hanging rope details that lead up to a "cloud village" near the ceiling. This vertical approach works brilliantly in narrow spaces beside wardrobes or doors, maximising your fairy village impact without requiring extensive wall coverage.
Bringing Your Fairies Village to Life: Colour, Light, and Texture
Choosing Colours That Work with Today's Nursery Trends
Soft palettes work beautifully with current nursery favourites like sage greens, clay blush, and mushroom neutrals. Try fairies in dusty pastels against warm white walls for a gentle, dreamy effect, or choose deeper forest greens with gold-accented stars for older children who prefer richer colours. Limit your fairies village to 3–4 main colours to avoid visual clutter, this creates a cohesive look that photographs beautifully and grows with changing room schemes.
Adding Safe "Magic" with Lighting
Battery-powered LED fairy lights along your sticker paths create enchanting evening magic when set to a 6-hour timer. Position clip-on night lights near the "fairy square", keeping them 30 cm from any fabric elements for safety. These simple additions transform your wall stickers into an immersive experience without requiring any electrical work, perfect for rentals.
Quick Magic: Making Your Fairy Village Glow at Night
- Battery LED strips along paths (6-hour timer setting)
- Clip-on night lights near main houses
- Glow-in-the-dark star stickers above the village
- Warm white fairy lights draped around door frames
Soft Textures Underfoot: Rugs, Cushions, and Canopies
Position a small round rug (80–120 cm diameter) as your "village green" where children can sit and play with fairy figurines or read stories. Add 2–3 washable floor cushions and, if ceiling height permits, a lightweight canopy to create an intimate story nook. These elements ground your wall stickers in the physical space, making the fairy village houses and accessories feel like part of a complete magical world.
For more on the importance of imaginative play in childhood development, see this authoritative resource on the importance of play.
Involving Your Child: Storytelling, Play, and Seasonal Fairy Village Updates

Turning the Village into a Story Starter
Give each fairy house a name and resident with simple traits, "Maple, who loves baking" or "Willow, who tends the garden flowers." Use bedtime to "visit" one house per night for a 3-minute story, letting your child choose which fairy to meet. Older children can add paper signs or tiny drawings with Blu Tack, making the village truly their own creation.
Simple Ways Children Can Help Decorate (By Age)
Toddlers (2–3) excel at choosing which fairy goes near which house, whilst preschoolers (3–5) can press down pre-placed stickers and help position flowers and stars. Early school age children (5–7) enjoy planning where paths and doors should go, plus moving "visiting fairies" seasonally around the village.
Using removable stickers means they can rearrange elements without damaging the wall. This hands-on approach helps children feel ownership of their space while developing their creative confidence.
Seasonal Fairy Village Swaps (5–10 Minutes Each)
One of the most delightful aspects of a fairies village created with removable stickers is how easily you can refresh it with the seasons. These quick updates keep the magic fresh and give you lovely bonding moments with your child.
Spring and Summer Village Transformations
Spring calls for cherry blossom stickers above fairy doors, tiny rainbow bridges connecting houses, and baby woodland creatures peeking from behind toadstools. Position these about 90cm from the floor so little ones can spot every detail during play. For more inspiration, check out these woodland creatures ideas for your fairy village.
Summer brings picnic scenes to your fairy village. Add miniature bunting between houses, butterflies near windows, and a tiny pond sticker complete with lily pads. A small blue circle sticker becomes a village pond, surrounded by flowers and visiting dragonflies.
Autumn and Winter Village Magic
Autumn transforms your fairies village with golden falling leaves, harvest mushrooms, and warm lantern stickers that create cosy evening scenes. Replace bright summer flowers with acorns and berries for a woodland harvest feel.
Winter adds sparkle with snowflake stickers dotting the village paths, icicle details hanging from fairy house eaves, and soft star clusters creating a magical night sky above the entire scene.
Four 10-Minute Fairy Village Refresh Ideas
- Swap seasonal flowers along the village paths
- Add weather elements (rainbows, snowflakes, sunshine)
- Introduce visiting animals for each season
- Change fairy clothing colours to match the time of year
Practical Tips: Applying, Moving, and Caring for a Fairy Village Made with Stickers
How to Apply Fairy Village Wall Stickers in Under 15 Minutes
Creating your fairies village becomes stress-free when you follow this timed approach. Start by wiping your chosen wall with a dry cloth and allowing it to settle for 5 minutes. This ensures optimal sticker adhesion. For a step-by-step walkthrough, see a step by step guide to applying nursery stickers.
Place your main elements first, the central tree, largest fairy houses, and primary pathway stickers. Position these lightly before pressing down, allowing yourself to step back 2-3 metres to check the overall balance. Once satisfied, smooth each sticker from the centre outwards, working out any air bubbles.
Add smaller details last: individual flowers, tiny fairies, and decorative elements that bring your village to life. This layered approach prevents overcrowding and ensures each element has breathing space.
Moving or Removing Your Fairy Village Without Marks
Premium removable stickers lift cleanly when removed properly. Peel each sticker slowly at a low angle, taking 10-20 seconds per piece. For stickers that feel resistant, warm the corner gently with your hand for 20-30 seconds before lifting.
Store removed stickers flat on their original backing sheets, this preserves the adhesive for future use and keeps your fairy village elements organised for the next room refresh or house move.
Common Problems and Simple Fixes
- Village looks cluttered? Remove every third small sticker and group remaining details instead of scattering them randomly.
- Stickers bubbling? Lift just the affected edge and smooth with a clean, dry cloth, working from centre to edge.
- Child outgrows elements? Keep core houses and paths, swap only the character stickers for age-appropriate alternatives.
- Textured walls? Stickers adhere best to smooth painted surfaces; test a small corner piece first on textured walls.
For more on the folklore behind fairies, see the Wikipedia entry on fairies.
Fairy Village Ideas for Different Homes and Budgets

Rental-Friendly Fairy Villages
Tenants can create stunning fairy villages without risking deposits. Focus your design on one main wall and wardrobe doors, using only removable elements. Avoid any permanent fixtures, no nails, screws, or paint additions.
Plan for quick removal by keeping your fairies village contained to easily accessible areas. A well-designed rental fairy village should disassemble completely in under 30 minutes, leaving walls pristine for your next adventure.
Fairy Villages for Small Spaces and Shared Rooms
Limited wall space doesn't limit magical possibilities. A 1-metre strip between wardrobe and window accommodates a charming fairy village, while bunk bed sides offer vertical village opportunities that don't interfere with shared floor space.
| Layout Type | Space Required | Best Age | Application Time |
|---|---|---|---|
| Small fairy village | 60cm-1m wide | 2-5 years | 10-15 minutes |
| Large fairy village | 2-3m wide | 3-8 years | 20-30 minutes |
Frequently Asked Questions
What materials and designs are recommended to start creating a fairies village wall using removable stickers?
Start with stickers that feature tiny houses, winding paths, and friendly fairies printed on premium, removable vinyl or fabric for easy application and clean removal. Look for layered designs that include 3D elements like fabric flowers or arch-shaped stickers to add depth and charm to your fairy village scene.
How can I involve my child in the creation and ongoing storytelling of the fairies village theme?
Invite your child to help arrange the stickers, choosing where the fairy houses and paths go to spark their imagination. Use the village as a backdrop for storytelling and play, encouraging your little one to invent fairy tales or seasonal adventures that you can update together with new stickers as their interests grow.
What are some practical tips for applying, moving, and caring for removable fairy village wall stickers?
Apply stickers to clean, smooth walls using a simple peel-and-stick method, smoothing out bubbles as you go. If you want to move or refresh the layout, gently peel off the stickers, our premium materials leave no residue, and reposition or store them safely for future use. Avoid placing stickers on textured or damp surfaces for best results.
How can I incorporate lighting and texture to enhance the magical ambiance of a fairies village in a child's room?
Add soft LED fairy lights around the village to create a gentle glow that brings the scene to life, especially at bedtime. Layer fabric flower stickers or textured elements alongside the vinyl designs to introduce tactile interest, making the fairy village feel even more enchanting and inviting for your child’s play and rest.